
Setting The Foundation For Production Success
Great music production starts well before hitting the record button. The planning and preparation phase sets the stage for turning good ideas into outstanding tracks. By taking time upfront to map out the project properly, you'll set yourself up for much better results.
Defining Your Project Scope
Just like building a house needs architectural plans, music production needs a clear direction from the start. Begin by answering key questions: What's the end goal for this track? Are you aiming for commercial release, making something for yourself, or scoring a film? Each path needs its own specific approach and considerations.
The Power of Reference Tracks
With your goals defined, gather reference tracks that align with your vision. These aren't for copying – they're signposts pointing toward your desired sound. Listen closely to how they handle specific elements. What draws you to the drum sound? How does the bass sit in the mix? Take detailed notes on the qualities you want to bring into your own work.
The reference track process helps translate abstract ideas into concrete steps. Breaking down what you love about certain songs gives you practical targets to aim for. For example, if you're drawn to the warmth of an acoustic guitar, you can plan out the specific mic placement and recording techniques to capture that sound.
Pre-production lays essential groundwork that many rush past. A solid pre-production checklist covers your song's vision, purpose, and sonic inspirations. Learn more about effective planning here: Free Pre-Production Guide
Creating A Detailed Session Plan
The session plan acts as your roadmap through recording and production. Map out your timeline, resources, and specific goals for each session. List all the instruments and gear you'll need, whether physical or virtual. This level of detail keeps everyone focused and aligned.
Be specific in your planning. For drum recording, detail exactly where you'll place mics, how you'll tune the kit, and what room sound you're after. This preparation helps sessions run smoothly and keeps the focus on capturing great performances. When each team member knows what to expect, you can maintain creative flow while handling technical details efficiently.
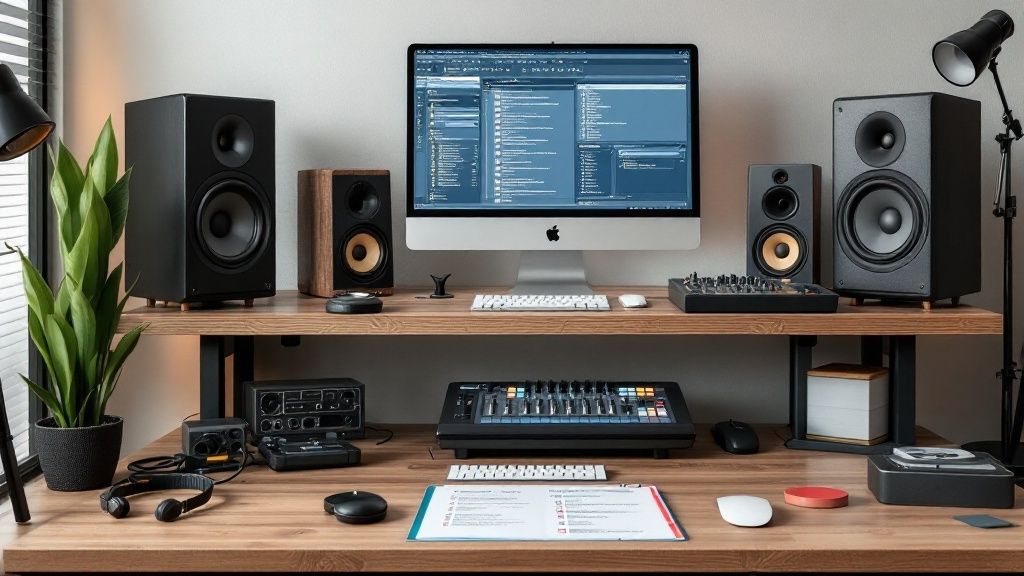
Building Your Professional Production Environment
Creating a solid music production setup goes beyond just acquiring fancy gear. Like a chef needs a well-organized kitchen, music producers need a workspace that sparks creativity and supports efficient work. Let's explore the key elements that make up an effective production environment.
Choosing Your Digital Audio Workstation (DAW)
Your Digital Audio Workstation (DAW) serves as the command center for all your music production tasks – from recording and arranging to mixing and mastering. Popular options include Ableton Live, Logic Pro X, Pro Tools, and FL Studio. Each DAW shines in different ways. For example, Ableton Live excels at loop-based production and live performance, while Pro Tools is the go-to choice for professional recording studios.
Essential Hardware and Software
A professional setup requires several key pieces of hardware working together. Start with a quality audio interface to convert sound signals between analog and digital formats. Good studio monitors and headphones are must-haves for accurate mixing. Many producers also find a MIDI keyboard essential for playing virtual instruments and controlling their DAW.
Software is equally important – choose plugins that match your production style and needs. The right combination of hardware and software creates a powerful production toolkit. According to a recent MIX Recording Studio checklist, having compatible and updated tools ready before starting production is crucial for a smooth workflow.
Optimizing Your Workflow and Ergonomics
Your workspace layout matters as much as the gear itself. Pay attention to ergonomics – your chair height, desk setup, and monitor placement all affect how comfortably you can work during long sessions. Keep your project files organized with a clear folder structure. These small details add up to make a big difference in your daily workflow.
Maintaining System Stability
Think of your production system like a car – it needs regular maintenance to run smoothly. Back up your projects frequently to protect your work. Keep your software and drivers current to avoid compatibility issues. A stable system lets you focus on making music instead of fixing technical problems.

Crafting Dynamic Song Arrangements

Strong foundations and professional production set the stage, but arranging is where your song truly comes alive. This phase lets you shape individual tracks into an engaging musical experience that guides listeners through emotional peaks and valleys.
Building Tension and Release
Think of your song as a compelling story. Just like any good narrative, it needs a natural flow of intensity and calm to hold interest. Tension and release are essential techniques for creating this dynamic movement. By gradually layering instruments and increasing complexity, you build anticipation. When you suddenly strip things back to basics, you give listeners that satisfying sense of release. Key changes and tempo shifts can also create powerful energy swings that keep people hooked.
Creating Seamless Transitions
The way you connect different song sections is crucial for maintaining flow. Smooth transitions act as musical bridges that carry momentum forward naturally. Rather than jarring changes, use transitional elements like short instrumental breaks, vocal runs, or subtle drum pattern variations to elegantly link parts together.
Maintaining Listener Engagement
Keeping ears perked requires thoughtful variety in your arrangements. Look for opportunities to introduce fresh instruments, vary vocal melodies, or add surprising sonic elements that reward attentive listening. Even within a defined genre or style, these dynamic shifts prevent your song from becoming predictable.
The backbone of successful production lies in solid song structure. Making sure verses, choruses and bridges connect logically while capturing the best possible performances of each element is key. A methodical approach using tools like a 21-point music production checklist helps maintain quality and consistency throughout the process. This type of structured workflow ensures all tracks are properly recorded and the strongest takes are selected before mixing begins. For an excellent example of a thorough checklist, check out 21-Point Music Production Checklist.
Organizing Your Sessions for Maximum Efficiency
Professional producers stay organized through clear track labeling, consistent color coding, and detailed session documentation. These habits save valuable time and make it much easier to recall creative decisions later. The efficiency gained allows more focus on exploring ideas and refining the final product.
By giving careful attention to dynamic arrangements, flowing transitions, and engaging variety, you transform raw tracks into a cohesive musical journey. This level of detail and intention is what helps great productions stand apart.
Optimizing Your Recording Space

Getting your recording space just right makes a huge difference in the quality of your audio. The best studios understand that sound moves and behaves differently in every room. Let's explore how to set up your space – whether it's a professional studio or home setup – to capture the cleanest, most professional sound possible.
Acoustic Treatment: Taming Your Room's Sound
Every room has its own sound fingerprint that can add unwanted coloring to your recordings. Acoustic treatment helps you control how sound bounces around your space. The key elements are absorption panels that reduce echoes and diffusers that spread sound waves more evenly throughout the room. For example, placing absorption panels on walls at key reflection points cleans up your sound, while diffusers create a more natural room ambience.
Microphone Placement: Capturing the Perfect Sound
Where you put your microphones can completely change how your recording turns out. Getting comfortable with different microphone techniques opens up creative possibilities – try close-miking when you want an intimate sound or room-miking to capture more of the space. Understanding your microphone's polar pattern (how it picks up sound from different directions) helps you position it exactly right for what you want to achieve.
Equipment Positioning: Enhancing Your Workflow
The way you arrange your recording gear can make or break your creative flow. Think about where everything should go – your audio interface, monitors, computer, and instruments – to create a space that feels natural to work in. Good ergonomics matter too. Position your monitors at ear level and keep your keyboard within easy reach. When your workspace feels right, you can focus on making music instead of fighting with your setup.
Adapting to Different Scenarios: Maintaining Consistency
Top producers know how to modify their spaces for different recording needs. They might shift their mic setup when switching from vocals to drums, or adjust acoustic treatment for different instruments. Places like the University of Mount Union show why this matters – their recording facilities include dedicated rooms with high-end gear that can adapt to any project. Check out their approach: University of Mount Union Facilities
A well-planned recording space with thoughtful acoustic treatment, smart mic placement, and efficient gear layout gives you the foundation for great recordings. Taking time to get these basics right pays off in the quality of your final product.
Mastering The Mix And Master Process
A polished mix and master can take your recording from good to exceptional. These final steps shape how your music sounds to listeners, making sure every element sits perfectly in the mix and delivers maximum impact across all playback systems.
Organizing Your Mixing Session: A Foundation for Success
Getting organized before you start tweaking knobs makes a huge difference. Start by clearly labeling tracks, using color coding, and grouping similar instruments like drums or vocals together. For instance, when your drum tracks are grouped, you can process them as one unit while still having easy access to individual tracks for fine adjustments. This simple prep work helps you focus better on how everything sounds.
Establishing Effective Processing Chains: Building Your Sonic Palette
Think of your processing chain like cooking – each effect serves a specific purpose, just like ingredients in a recipe. Begin with EQ to balance the frequencies, add compression to control dynamics, then use reverb and delay to create space and depth. But remember – less is often more. Just as too much seasoning can ruin a meal, overdoing effects can make your mix sound muddy.
Preparing Your Tracks for Mastering: The Bridge to a Polished Product
Clean tracks make mastering much smoother. Always leave enough headroom – aim for peaks around -6dBFS so there's space for the mastering process. This buffer lets the mastering engineer optimize loudness while keeping the sound clear and punchy. Double-check all your fades and edits to make sure there aren't any unwanted noises or clicks.
Quality Control Measures: Ensuring Professional Standards
Listen carefully and compare your mix to songs you admire. Test it on different systems – studio monitors, headphones, car speakers, and even phone speakers. For example, a mix might sound perfect in your studio but reveal harsh frequencies on smaller speakers. This thorough testing helps ensure your track sounds great everywhere.
Achieving a Professional Sound: Proven Strategies
Getting that commercial-quality sound requires attention to detail. Make sure elements are balanced across the stereo field and your track matches the loudness of similar releases in your genre. While mastering might seem mysterious, understanding basics like gain staging, limiting, and dynamic processing helps you work better with mastering engineers.
Critical Listening Techniques: Refining Your Ear
Sharp listening skills are crucial for mixing and mastering. Train yourself to notice subtle differences in frequency balance, dynamics, and stereo placement. Study professional mixes like you would study a complex recipe – identify each element and how it contributes to the whole. This focused practice will help you make better mixing decisions.
By following these guidelines and developing your skills, you'll create mixes that sound professional and engaging. The mix and master stages are where your music truly comes alive, ensuring your tracks connect with listeners on any system.
Delivering Professional-Quality Results
The final stage of music production centers on refining your tracks for release. Getting these last steps right separates amateur projects from professional releases through systematic quality control, platform optimization, and meeting distribution standards.
Quality Control: The Final Listen
A thorough quality check before release is non-negotiable. Test your mastered tracks on multiple systems – listen through professional studio monitors, consumer headphones, car speakers, and mobile devices. Each playback system reveals different aspects of the mix that you might miss otherwise. Focus on assessing the overall loudness, frequency clarity, and stereo field. Your goal is a mix that sounds great everywhere.
Optimization for Different Platforms: Making Your Track Sound Great Everywhere
Each music platform has its own technical specifications and loudness requirements. A mix perfect for Spotify might need adjustments for radio or Apple Music. Creating platform-specific masters helps maintain consistent sound quality across services. This often means making subtle EQ, compression and limiting tweaks to match each platform's standards. For example, radio typically needs a louder master compared to streaming services.
Preparing for Distribution: Meeting Industry Standards
Distribution preparation requires following precise technical guidelines and metadata protocols. Platforms typically want either WAV or FLAC files for highest quality, or MP3s for efficient streaming. Accurate metadata – including song titles, artist info, album artwork and other details – ensures your music is properly cataloged and discoverable. Getting these details right makes a big difference in helping listeners find your work.
Mastering the Technical Requirements
Understanding key specifications like sample rate and bit depth is essential. While recording at 96kHz captures more detail, most platforms prefer 44.1kHz for compatibility. Similarly, 24-bit audio provides more dynamic range, but 16-bit conversion is often needed for distribution. Knowing these technical aspects prevents playback issues across devices.
The Music Production Checklist: A Final Overview
Follow this checklist to ensure professional-quality results:
- Comprehensive Listening Test: Check your masters on various systems – monitors, headphones, car audio, and portable speakers
- Platform Optimization: Create specific masters matching each distribution channel's requirements
- File Format Conversion: Export to appropriate formats based on platform guidelines
- Metadata Completion: Include all required tags – titles, artists, album info, and artwork
- Technical Specifications: Verify audio files meet sample rate and bit depth standards
Following these steps helps your music meet professional standards and reach listeners effectively across all platforms.
Ready to take your audio production further? Tune Tailors provides expert mixing, mastering and sound design services to bring your creative vision to life. Our experienced team helps you achieve professional results that stand out. Contact us today for a free consultation and learn how we can enhance your music.